
Having a box of old RaspberryPi computers kicking around I wanted to make sure they weren’t just languishing around doing nothing. One problem I’ve hit recently is that many devices have self-signed certificates installed, giving certificate errors I have to bypass every time I access them. Why not use an RaspberryPi to be my certificate authority?
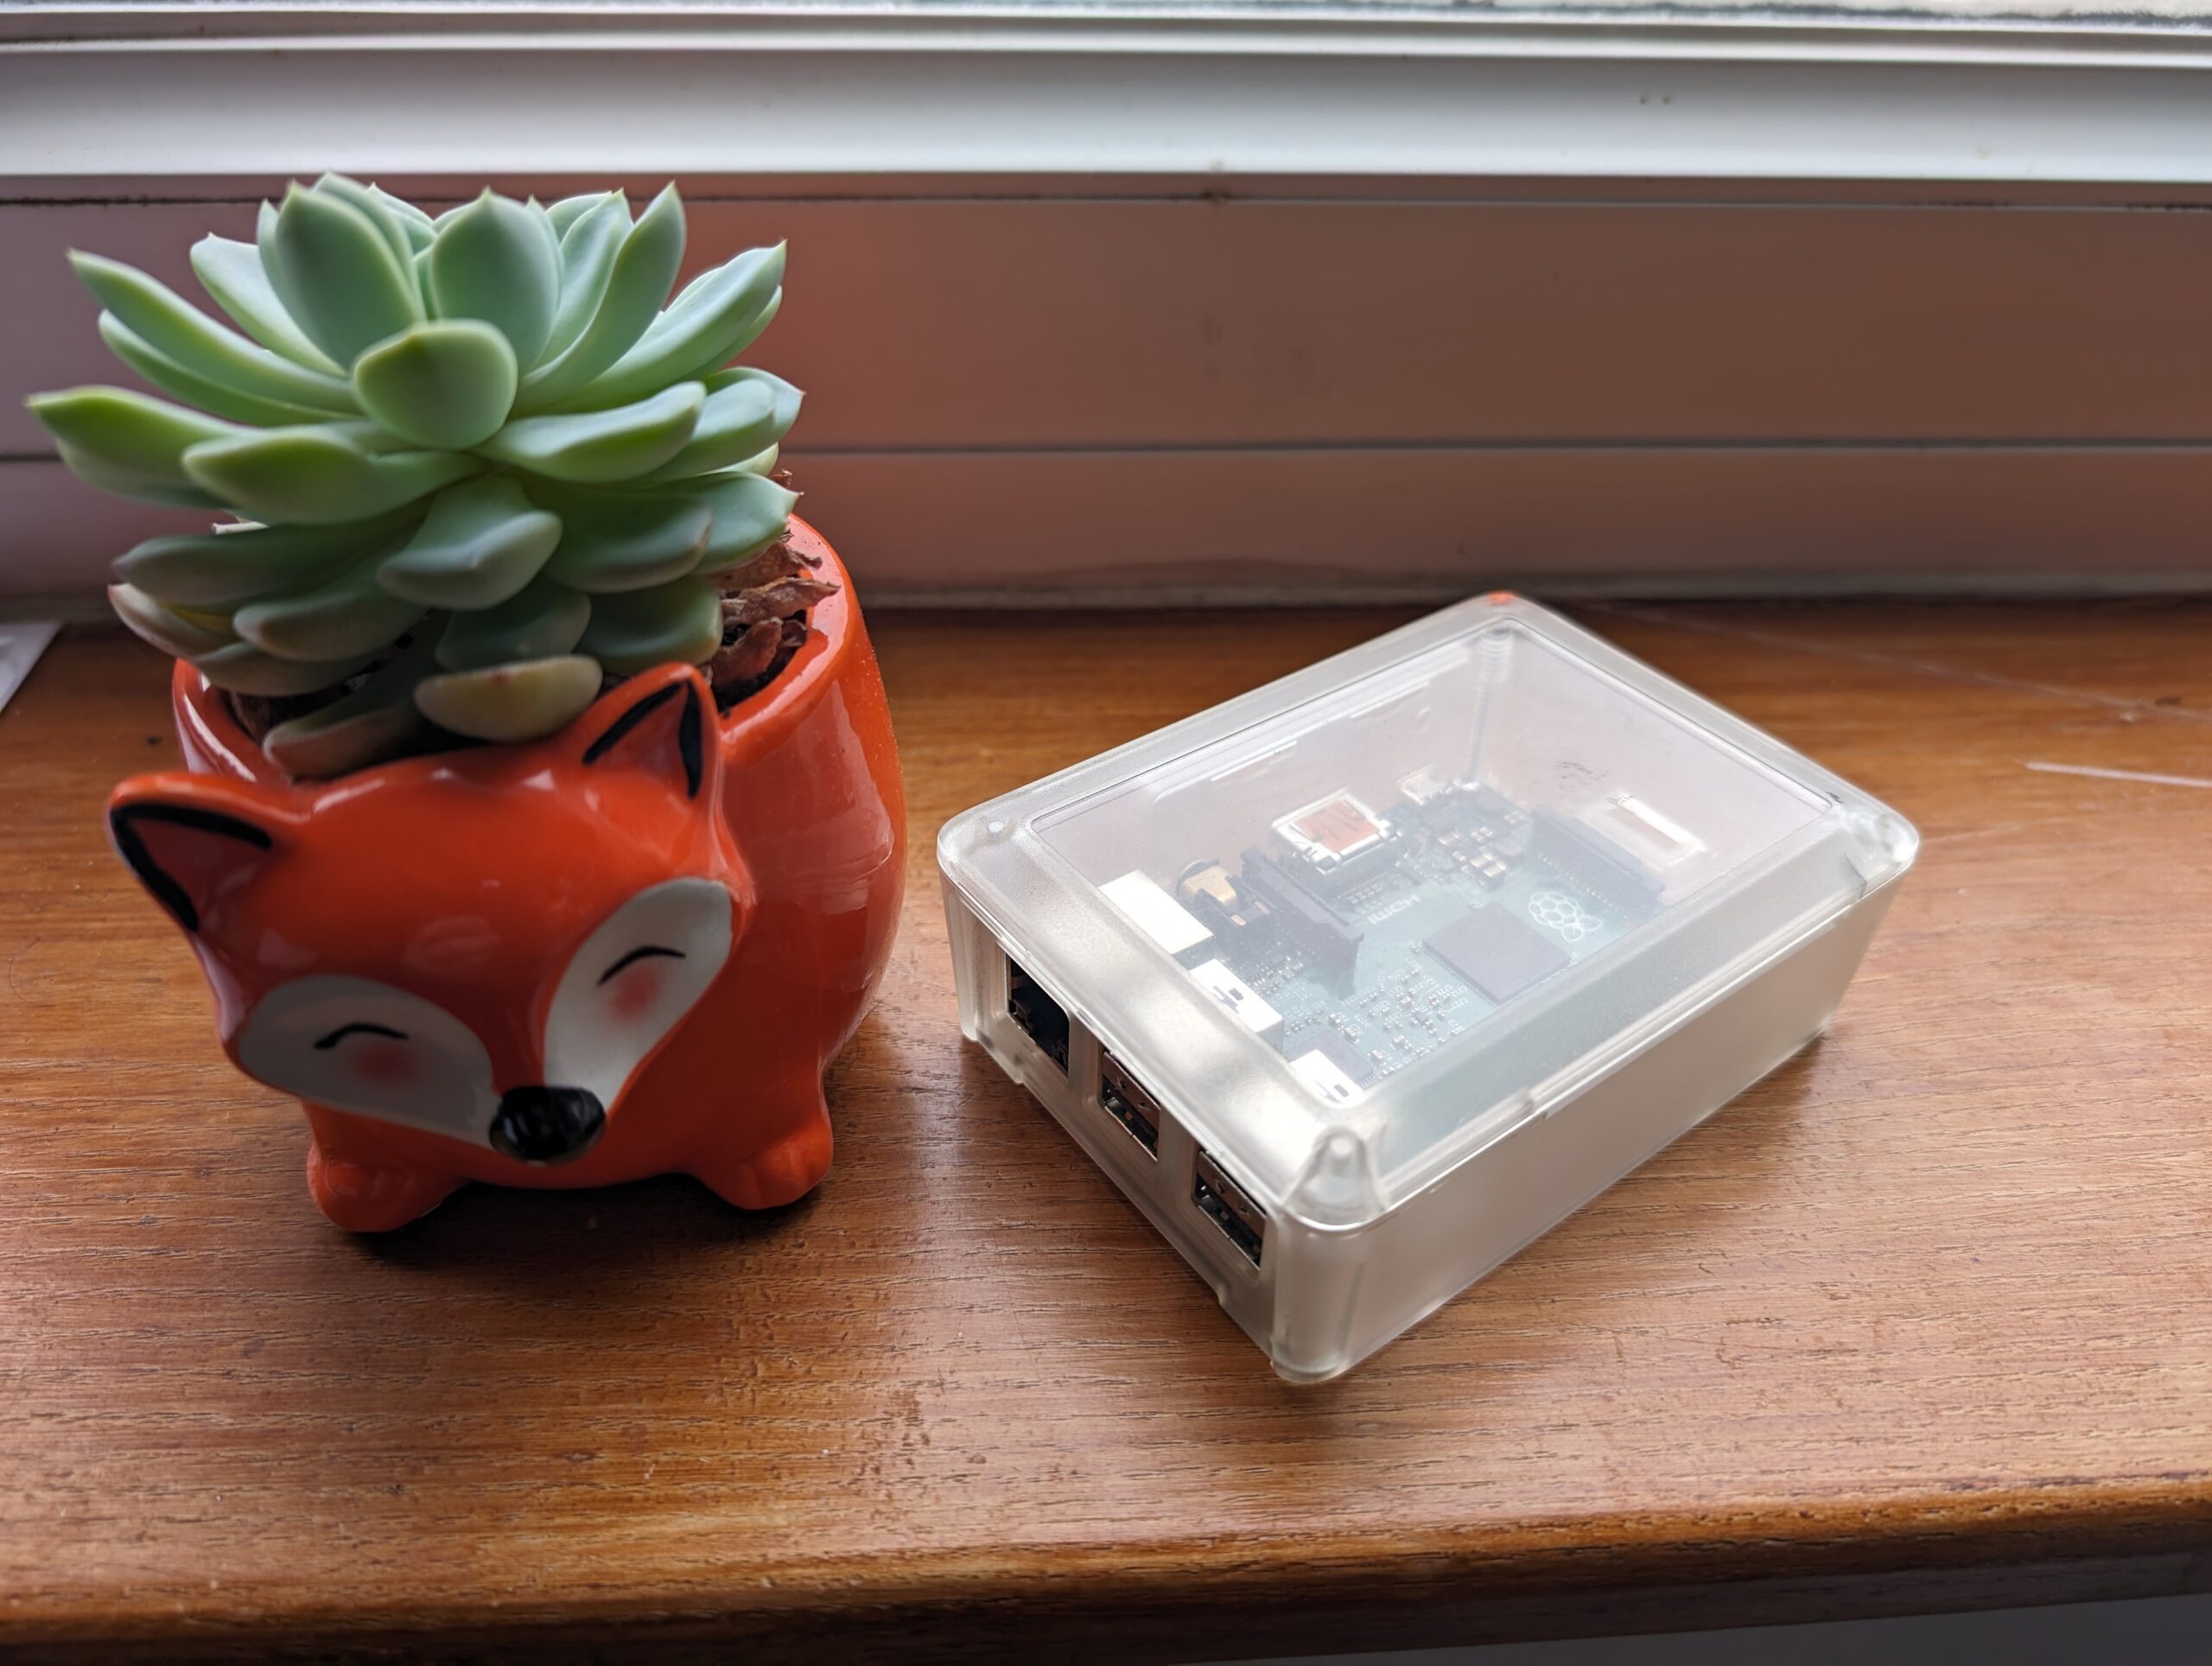
I wanted to use one of my RaspberryPi 2 computers, because this is about the most lightweight task possible! I wanted to pick an operating system that had the longest support period possible.
| OS | Supported Until | RPi 2 Support |
|---|---|---|
| RaspberryPi OS (Bookworm) | June 2028 | No |
| RaspberryPi OS (Bullseye) | June 2026 | Yes |
| Ubuntu 22.04.3 LTS (Jammy Jellyfish) | June 2027 | Yes |
So Ubunutu it was to be. One lesson I learnt is, make sure on the RaspberryPi Imager tool that you untick the wifi options within the customisation. If you fail to do this then the build scripts that run on first boot fail because the RPi 2 has no WiFi and for some reason the netplan created has no mention of ethernet. The end result is that the RPi boots but can’t connect to any network at all!
Beyond the normal waiting 5 minutes or so for Ubuntu cloud installer to complete and then a final “apt update” then “apt upgrade”, there is nothing that actually needs to be installed to make this RPi a tiny certificate authority – it is all handled by OpenSSL which is installed by default.
As this is a security risk if not secured then please take all reasonable steps to secure this RPi.
Creating the Certificate Authority
Step 1 – Create Folder
While this isn’t essential, having a folder to keep all your certificates in is sensible.
mkdir cert
cd cert
Step 2 – Generate CA Private Key
This private key will be used to secure your certificate authority. That means selecting a strong encryption standard and a suitable number of bits. In a domestic setting you’re probably fine with 2048 bits and using AES256. You want to avoid weak cyphers such as des3 (tripple des) as they are known to be broken.
openssl genrsa -aes-256-cbc -out <yourcaname>.key 2048This will prompt you for a password to secure the key with. Ideally make this password long as it secures your CA private key.
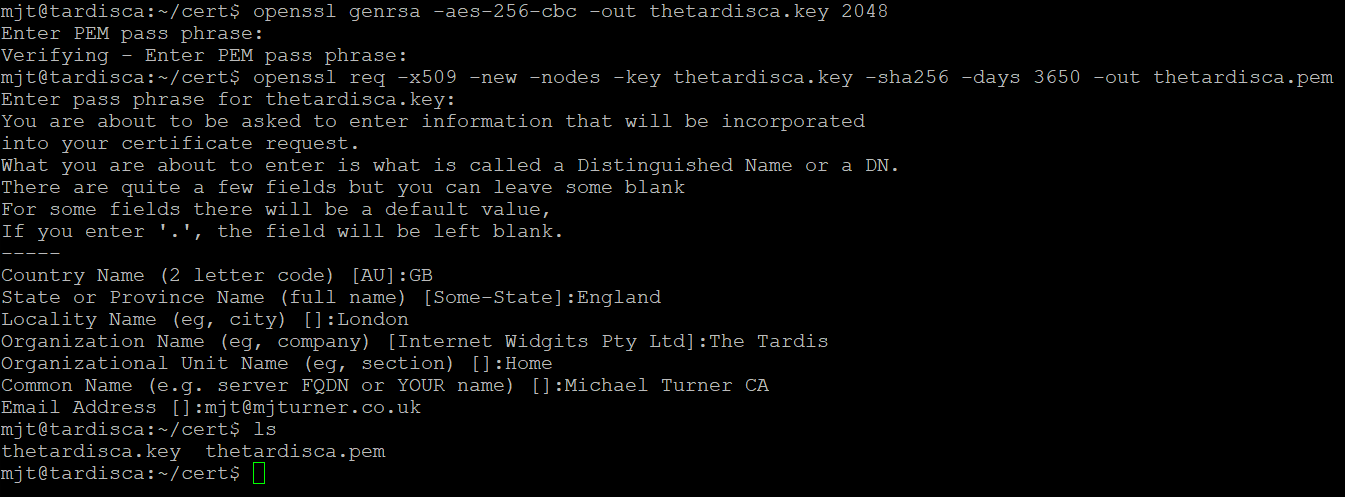
Step 3 – Generate CA Certificate
The next step is to create a public key certificate that can be distributed to all your client devices so they trust this new CA. A key decision is, how long do you want this CA to be valid for? A CA can’t issue certificates that live longer than itself, and given the manual nature of this process do you want to have to deal with renewals? I recommend a CA life of at least the supported lifetime of the operating system, but in my example I’m going with 10 years.
openssl req -x509 -new -nodes -key <yourcaname>.key -sha256 -days 3650 -out <yourcaname>.pemYou’ll be prompted for the password your set in the previous step along with all the usual certificate information such as country, organisation, common name etc. What you put in here doesn’t matter, but it will appear when viewing a certificate so it is worth setting something easy to recognise as your certificate authority.
What you should end up with is something like this:
Step 4 – Distribute your CA Certificate
The “.pem” file created in step 3 is your public certificate. You’ll need to import this in to any devices you want to trust that certificate authority. Typically this will be your desktop or laptop computer, but may extend to other devices too. I recommend searching for instructions for adding a trusted certificate authority for your particular device.
Creating a Certificate
Of course this would all be pretty useless without creating any certificates. There are two approaches to this, first is to go to the device you wish to install a certificate on and generate a Certificate Signing Request (CSR). This is by far the most secure method as the private key doesn’t leave the device. If your device doesn’t support this or you’d rather do everything from the certificate authority, then you can generate the CSR from the command line on the certificate authority instead.
For any of this to be useful your device needs to have an FQDN that you’ll use to access it. There are two options, you can depend upon mDNS for naming such as <yourdevice>.localdomain or if you have a real domain you can use that to resolve local hosts. The latter is handy if you have client devices that don’t support mDNS although it can expose your internal IP addresses to the Internet.
Step A – Obtain CSR
Either use the device to generate the CSR (prefered) or use the following command on the certificate authority to create it.
openssl genrsa -aes-256-cbc -out <devicename>.key 2048You’ll be prompted for a password for the key created. Then you’ll need to create the CSR itself.
opensll req -new -key <devicename>.key -out <devicename>.csrYou’ll be prompted for the password you entered when creating the key. Then you’ll be asked all the same questions as you did for your root CA certificate. The only important one is the common name should be the FQDN of your device. You can leave the challenge password blank.
Step B – Define Uses
You’ll need to define what purposes an issued certificate can be used for and what names you’ll want it to be valid for. To do this we need to define the extensions attributes. Save the following configuration as <devicename>.ext but setting the names within the “san_names” section appropriately.
authorityKeyIdentifier=keyid,issuer
basicConstraints=CA:FALSE
keyUsage = digitalSignature, nonRepudiation, keyEncipherment, dataEncipherment
subjectAltName = @san_names

[san_names]
DNS.1 = <devicefqdn>
If you might access the system via multiple names, e.g. if you might access it via “<devicename>.localdomain”, “<devicename>” or “<devicename>.local”, then you’ll want to expand the “san_names” section to include all possible names that might be used.
Step C – Sign the CSR
We now need to use our certificate authority to sign the CSR and generate the final public certificate.
openssl x509 -req -in <devicename>.csr -CA <yourcaname>.pem -CAkey <yourcaname>.key -CAcreateserial -out <devicename>.crt -days 3649 -sha256 -extfile <devicename>.extYou’ll be prompted for the private key password for your certificate authority. Then the certificate signing request will be completed and you’ll have the CSR reponse file.
Step D – Complete Certificate Installation
You’ll need to install the signed certificate on to the device. If you generated the CSR on the device then all you need to do is get the <devicename>.crt file generated in the previous step and perform whatever the complete signing request process looks like for your device.
If you generated the CSR on the certificate authority itself then you’ll need both the <devicename>.crt and <devicename>.key files. You’ll then need to import both of them into your device, the exact process of which will vary.
Some devices will need you to tell it which certificate to use, so you might find once the certificate is installed you need to go and pick the newly installed certificate as the one to be used.
Testing
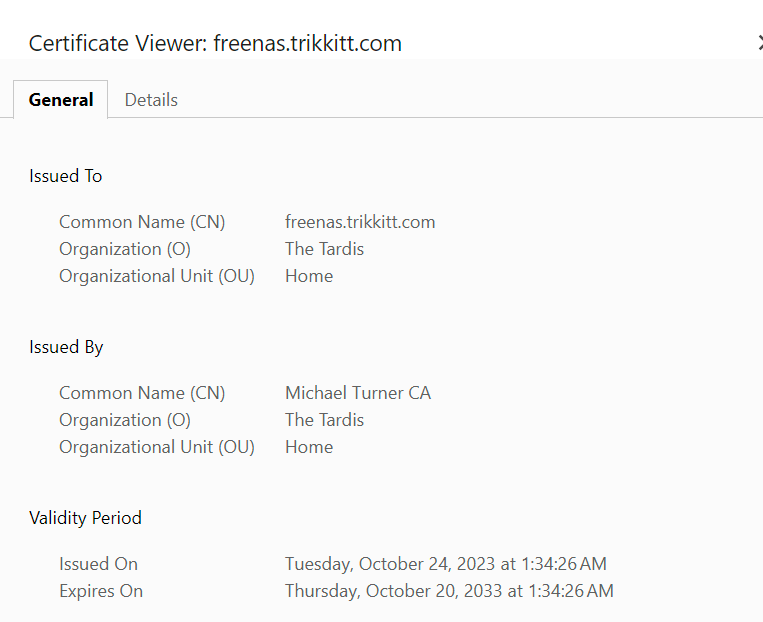
The final step is to validate it works. From a device that you’ve installed the trusted certificate authority root CA cert on to, use the browser to access the device via its FQDN (not its IP address). You should see no certificate errors or warnings.
On Chrome you can view this by clicking on the round icon to the left of the URL. It should say “Connection is secure”. You can click on this, then at the bottom you should have “Certificate is valid” with an icon to the right showing a box with an arrow. If you click on this you’ll get something like this:
If you see any errors then the most common issues:
- Name mismatch – the name you’re accessing it with doesn’t match those in the certificate. Make sure the subjectAlternateName list contains the FQDN that you’re using to access it.
- Untrusted Certificate – Your device doesn’t trust your certificate authority for some reason. Make sure you’ve imported the root CA certificate in to the trusted root CA store.
- Certificate Date – One or more devices have the wrong date/time making the certificate invalid. Make sure the time is set correctly on all devices. Remember the RPi doesn’t have a battery backed clock so if it can’t access NTP time then that will be wrong.
- Certificate Purpose – Your use of the certificate needs to match the certificate purpose. If the correct use types aren’t in the extensions file then you’ll get errors.
Stay Safe
Now you have your own CA and a nice new purpose for your old RaspberryPi 2, you should consider a few things.
- Keep it secure – your devices now trust the CA and the private key stored on this RPi. Follow all best practices such as not reusing passwords etc.
- Turn it off – This device does not need to be left turned on. You can unplug it and just power it up when you wish to create a new certificate.
- Backup – You might want to create a backup of your private key and certificate, but do so carefully.
- Remember Expiry – Your certificates will eventually expire. Consider setting a reminder quite some time out, especially for the CA certificate. You can build a new CA or create a new CA certificate and have both in operating at once provided the original hasn’t expired.
And Finally…
I plan to do a few more things with this in the future, create some simple scripts to make the process more streamlined, and try putting my CA certificate on a Yubikey so that I can keep the private key totally locked away. I also need to look in to CRLs, but it isn’t too much of a worry because if the worst happens I’ll just remove the trusted root CA from my handful of devices.